You What? Butter?


Yes, I do, make our butter.

I don’t make all of our butter, but for buttering toast, bread and veggies I make and use wonderful raw, grass fed butter. Not only is it yummy it is actually good for you! Imagine that!

(for more information go here: http://www.eatwild.com/healthbenefits.htm)

(this is my grandma’s old butter churn, I wish I knew where she got it from and if she used it!)

Over the last year I have been reading and researching alternative methods of eating and nutrition. It isn’t as much alternative as it is traditional, the kinds of food my great-great grandparents would have eaten. It is a far cry from the processed foods that are considered “health” foods. If it has a bunch of ingredients, or I can’t pronounce any ingredients or they have been “fortified” we have been slowly eliminating them from our diet.


One big change we have made is from drinking organic grain fed vitamin D fortified processed milk (homogenization and pasteurization is processing) to whole raw grass fed organic milk.

For more information you can go here:
http://www.westonaprice.org/splash_2.htm
http://www.realmilk.com/
http://www.raw-milk-facts.com/raw_milk_health_benefits.html

Because my milk isn’t homogenized the cream rises to the top of my milk jugs and I figured I could start making my own butter.

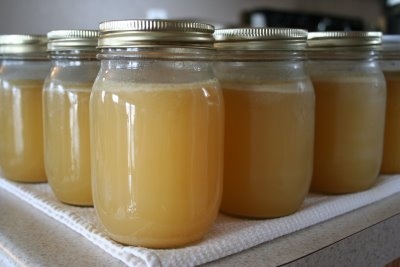
First I collect the cream from off the top of my milk. I don’t skim it all off, I want some of the butter fat in the milk so the fat soluble vitamins could actually work when we drank the milk. Once I had collected a couple of quarts it is butter making time! I let the cream sit for a couple of hours on the counter to warm up, then I pour it all into my churn.

Then we crank the handle and churn away, the kids really like to help with this.

The cream gets nice and frothy.

And in a little bit the butter fat will start to separate from the liquid.


Just a bit more churning and the butter fat collects into a nice big lump floating in the sweet butter milk.


Once the butter is out of the churn it need to be rinsed and rinsed in cold water until the water runs clear. I need to get all the butter milk out, so it won’t go bad sitting out. Isn’t it pretty and yellow, this yellow coloring is all the vitamin A concentrated in the butter fat. A lot of commercial butter will add a little coloring to give their butter the yellow color.

The color of grass fed butters change over the season. In the spring the butter can be almost orange from all the vitamins gleaned from fast growing spring grasses. In the winter it will be whiter, because the hay has less vitamin A in it.

After that, a little salt

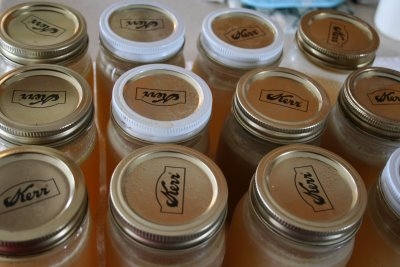
I then pack it into little jars and put it in the freezer until needed. The jar that I am taking butter from stays in the fridge until it is needed, then I take it out for a couple of hours before hand to soften.

(I love these little squaty bottles)

The left over butter milk (it is sweet, very different from cultured buttermilk that we are all familiar with) is saved for use in recipes.

Is making butter this way cheaper than what I can buy at the grocery store? No, but the extra expense is worth it to me. We literally are what we eat, if we are eating overly processed foods with synthetic vitamins and minerals our body is not going to function very well. We will be chronically tired and suffer from degenerative illnesses. Our bodies have been eating natural whole foods for thousands of years, it has only been in the last 100 years or so that we have changed the foods we eat, even something as simple as milk and butter are completely different that what our ancestors ate long ago. It isn’t surprising to me that the incident of degenerative disease has gone through the roof in the last 50 years.
(oh wow…soap box! didn’t see that coming!)
If you are interested in more information I would like to recommend these books and sites:

Making Soap

Fall time is soap making time, at least once all the canning is done!

There really is a particular reason I pick this time of year to make soap and it has to do with the amount of daylight and the temperature outside.


I use lye in my soap making and lye gives off some pretty nasty fumes at first, I like to be able to keep the windows open to let the fumes disperse. In the winter it is too cold and in the summer it is too hot!

I could make soap in the springtime, but the days are getting longer and my attention is focused outside planting my gardens.

The picture above is my soap in its mold the morning after I made it.


I pop it out of the mold in one big solid block.


And cut it up into neat squares.


The soap then needs to sit for six weeks or more to cure and harden. Then it becomes wonderful soap that I use for everything, from washing my face to washing dishes and laundry. This is wonderful stuff!

This link is where I got my recipe and know-how from.

Why make my own soap?

Well, it is about getting back to a slow self sustaining life. I know I can run to Walmart and purchase soap for a lot less than I can make it at home. That soap will also be full of chemical and synthetic fragrances. The natural occurring glycerins are pulled out of the soap and petroleum based moisturisers are added back in. With homemade soaps I know exactly what is going on my skin and on my children’s skin. This soap seems to last longer too, I only need about 4 batches to get me through the year, and I use it for household cleaning too not just for bathing.

It also makes a really fun impromptu gift for any occasion.

Have a wonderful day!

Vodak + Vanilla Beans

A couple of days ago I posted this picture with the caption:
“What is a good Mormon girl doing with a gallon and a half of Vodka!”

I got a lot of funny comments on my blog and facebook and some great ideas were thrown out. I would like to address some of those comments.

No, it isn’t for a secret night cap or to get me though the day

It isn’t for cleaning paint brushes, I didn’t even know you could do that!

No, it isn’t for our year supply.

No, it isn’t to keep on hand to barter when times get bad.

I am not making herbal tinctures (good idea though)

Several people guess vanilla extract, and they were correct.

I saw a tutorial for making homemade vanilla and me, being who I am, just had to try it.

To make vanilla extract you need a gallon of Vodka (the cheaper the better, that stuff can be expensive) and 3/4 pound of vanilla beans.

(I got my vanilla beans here)

Place the beans in a gallon sized glass jar


and pour the vodka over the top.

Let it sit for 5 to 6 months, and there you have it,
Vanilla Extract.
(sorry the pictures were so bad, it was dark outside and I just can’t get good pictures in my kitchen without natural light)

My friend Charlotte wanted to know if I felt weird purchasing the Vodka. I will be honest and admit that I sent my husband for the liquor. In Utah you can’t buy liquor at the grocery store, there are special State Liquor stores that you have to go to, and he said he felt like a fish out of water.

Also, I had to take a little sniff of the stuff, and all I can say is “why would someone want to drink it?!” It smelled so bad, like rubbing alchohol!


Now the real question: What are we going to do with the extra half gallon of Vodka!

First Things First

In the majority of my salads I add grilled chicken. I don’t really know why I call it grilled, because it isn’t really grilled, more like baked, but grilled sounds so much better so that is what I will call it. Anyway, in most of my salads I add chicken, I am serving them as the main meal and I think it helps to fill up tummies when there is a little meat. It also helps Dadzoo wrap his brain around the idea that, seriously, dinner is a salad. Not that he complains, but I swear I can see visions of steak and potatoes dancing around his head while he eats my “chick” food!

I figured I would show you how I bake my chicken.

First I place the chicken breast in a plastic, zip lock bag.


Then I pound it like a crazy woman, it is fabulous therapy! It needs to be pounded out evenly so it will cook evenly.


When it is nice and flat, place it on a baking sheet and season, I add salt and pepper, very simple, but good.

Bake at 350 for about 40 minutes, or until done, turning the chicken at least once in the cooking process.


When the are all cooked I let them cool, then place them in a bag in the freezer, then when I need them they get pulled out and thawed all day in the refrigerator.

Later today I will post the first salad recipe in my series!

Chicken…er…Turkey broth

I really enjoy canning. I love that I can take with my own two hands wonderfully nutritious foods and preserve them in a way that my family can enjoy it for months to come. It satisfies me to know that no matter what happens, there will be food on the table, and not just any food, but good foods without added preservatives and flavorings. When I am finished canning and I line those jars up on the shelves I feel a sense of pride and accomplishment. I am a Home Economist and I have ensured for a little while that the economy of my home will stand, with full belly’s!

For the last little while I have been trying to use all my food to the last little bit and not let anything go to waste. Sometimes I am really good at this, other times I slack off a bit! Sunday I made a big Turkey dinner and Monday morning I set that big old Turkey carcass in my biggest stock pot and let it boil all day. Usually when I make broth I freeze it, but Monday I decided that I was going to try something different. A couple of weeks ago I canned potatoes, it was my first attempt at using a pressure canner and since nothing blew up I figured I could give it another try. This is what I ended up with, and I am so proud!

12 pints of homemade turkey broth, ready to sit on my shelf and become dinner at some point.

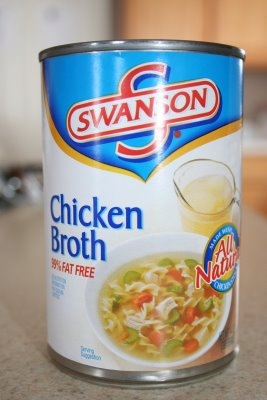
As I mentioned before, I like canning because it give me the ability to control what is in my food without spending a fortune. I wanted to see what is in a store bought can of chicken broth, so I dug one up one lonely can and read the label.

It really as very few ingredients, there are some that I can’t pronounce and have no idea what they are. There is one big bad ingredient that I like to avoid completely and that would be Monosodium Glutamate, or also known as MSG. It isn’t good for our bodies, and a lot of people (including me) have sensitivities to it, there are some people who are very allergic to it. Cooking and preserving from scratch makes it possible for me to avoid all the unwanted ingredients. I know exactly what is in my broth: turkey; onions; garlic; salt; pepper; sage; thyme; and parsley.

Cooking and canning from scratch also gives me the flexibility to alter recipes to the tastes of my family. I know that the broth I made is going to be exactly how I like it with as much or as little salt as I want.

What kinds of things do you cook from scratch?