Woman

“She was a battered woman now, not a lovely girl; but she still had that something which fires the imagination, could still stop one’s breath for a moment by a look or gesture that somehow revealed the meaning in common things. She had only to stand in the orchard, to put her hand on a little crab tree and look up at the apples, to make you feel the goodness of planting and tending and harvesting at last. All the strong things of her heart came out in her body, that had been so tireless in
serving generous emotions.”
My Antonia, by Willa Cather.

That is how I want to be described in the latter years of my life.

You What? Butter?


Yes, I do, make our butter.

I don’t make all of our butter, but for buttering toast, bread and veggies I make and use wonderful raw, grass fed butter. Not only is it yummy it is actually good for you! Imagine that!

(for more information go here: http://www.eatwild.com/healthbenefits.htm)

(this is my grandma’s old butter churn, I wish I knew where she got it from and if she used it!)

Over the last year I have been reading and researching alternative methods of eating and nutrition. It isn’t as much alternative as it is traditional, the kinds of food my great-great grandparents would have eaten. It is a far cry from the processed foods that are considered “health” foods. If it has a bunch of ingredients, or I can’t pronounce any ingredients or they have been “fortified” we have been slowly eliminating them from our diet.


One big change we have made is from drinking organic grain fed vitamin D fortified processed milk (homogenization and pasteurization is processing) to whole raw grass fed organic milk.

For more information you can go here:
http://www.westonaprice.org/splash_2.htm
http://www.realmilk.com/
http://www.raw-milk-facts.com/raw_milk_health_benefits.html

Because my milk isn’t homogenized the cream rises to the top of my milk jugs and I figured I could start making my own butter.

First I collect the cream from off the top of my milk. I don’t skim it all off, I want some of the butter fat in the milk so the fat soluble vitamins could actually work when we drank the milk. Once I had collected a couple of quarts it is butter making time! I let the cream sit for a couple of hours on the counter to warm up, then I pour it all into my churn.

Then we crank the handle and churn away, the kids really like to help with this.

The cream gets nice and frothy.

And in a little bit the butter fat will start to separate from the liquid.


Just a bit more churning and the butter fat collects into a nice big lump floating in the sweet butter milk.


Once the butter is out of the churn it need to be rinsed and rinsed in cold water until the water runs clear. I need to get all the butter milk out, so it won’t go bad sitting out. Isn’t it pretty and yellow, this yellow coloring is all the vitamin A concentrated in the butter fat. A lot of commercial butter will add a little coloring to give their butter the yellow color.

The color of grass fed butters change over the season. In the spring the butter can be almost orange from all the vitamins gleaned from fast growing spring grasses. In the winter it will be whiter, because the hay has less vitamin A in it.

After that, a little salt

I then pack it into little jars and put it in the freezer until needed. The jar that I am taking butter from stays in the fridge until it is needed, then I take it out for a couple of hours before hand to soften.

(I love these little squaty bottles)

The left over butter milk (it is sweet, very different from cultured buttermilk that we are all familiar with) is saved for use in recipes.

Is making butter this way cheaper than what I can buy at the grocery store? No, but the extra expense is worth it to me. We literally are what we eat, if we are eating overly processed foods with synthetic vitamins and minerals our body is not going to function very well. We will be chronically tired and suffer from degenerative illnesses. Our bodies have been eating natural whole foods for thousands of years, it has only been in the last 100 years or so that we have changed the foods we eat, even something as simple as milk and butter are completely different that what our ancestors ate long ago. It isn’t surprising to me that the incident of degenerative disease has gone through the roof in the last 50 years.
(oh wow…soap box! didn’t see that coming!)
If you are interested in more information I would like to recommend these books and sites:

The Root Cellar…er…Basement


A blogger friend want to know about my sorta-kinda root cellar.

I don’t have a true blue root cellar, I wish I did, that would be so homesteadish!

Anyway, until we move to a farm and I can get Dadzoo to build me a real root cellar my basement will have to do. Really it does quite well. My basement is only partially finished, there are two rooms, a bedroom and an office, then there is a big open unfinished space and this little room. Dadzoo walled this off very soon after we moved into this house and built some shelves. There have been times that this little room was pretty empty, however the last few years I have been stocking up. About two weeks ago Dadzoo went and bought me some more shelves and so now I feel like I can share what my root cellar is like, things aren’t piled all over the place anymore!

This is the view from one end of the room, facing the shelves Dadzoo built a long time ago, that is where I am keeping all my canning. Underneath I have buckets and boxes (the boxes hold #10 cans) of rice and beans. I don’t have nearly enough rice and bean stored, it is a work in progress.

This is to the left of the door, these shelves are where all my caning supplies and misc jars are stored. In the back corner I have buckets of wheat, each bucket has about 40 pound of wheat. I am still working on stocking up on wheat.

These shelves are directly across from the door. The shelves on the right hold baking items, oatmeal, some boxes of pasta on the top and the bottom shelf will hold bags of flour and sugar, I need to do some more stocking up of those, I have been a bit lazy lately. The buckets in front are for flour and sugar. After I open the bags I pour the contents in the buckets and that is what I use when I bake. The bucket in the middle is full of wheat, I use freshly ground wheat in my baking. The shelf on the left holds fresh produce, vinegar, a bin of candles and other misc items.

In the left corner is my deep freeze.

Here is a shelf that has a box of tomatoes slowly ripening, a basket of apples and the big bushel basket holds onions. Below I have another big box of tomatoes and 150 pounds of potatoes in bags and baskets.

On the far wall is a widow. I love and hate this window. It makes for nice natural light, however that isn’t always a good thing when you are storing produce and you want it to go dormant. I need to cover it. I also keep it opened a crack all the time to let in the cold air. This room stays between 40 and 50 degrees in the winter, perfect for keeping potatoes.
(in case there is a weird-o reading this post and now thinks they know how to break into my house let me tell you a few things: first, there is nothing of value in my house, second, I own a big dog..ok not really, third, my husband owns guns that he doesn’t get to shoot often and is always looking for a chance to do so, and fourth, there is a security measure on this particular window that allows it to stay open a crack but no further.)

To the right of the door are my original shelves, they are nice and deep so I can store a lot there.


On the top shelf I keep all my pint jars. From right to left I have: Syrups, Jellies, Jam, Fruit Butters, Green Relish, Chili Sauce, Tomato Sauce, Tomato Soup, Chicken Broth, Apple Sauce and some Salsa.

On the bottle shelf I have my quart jars. From right to left: Stewed Tomatoes, Tomato Juice, Tomato Soup, Potatoes, Apples, Grape juice, and misc canned items (I hope someday to not have to purchase many canned items from the store.)

These shelves change as the year goes on, in the early winter I will can more potatoes and there will be more room because a lot of the tomatoes will have been used.

So there you have it, my root cellar. The biggest thing is to keep the room cool and dry.

Do you have a food storage room?

Making Soap

Fall time is soap making time, at least once all the canning is done!

There really is a particular reason I pick this time of year to make soap and it has to do with the amount of daylight and the temperature outside.


I use lye in my soap making and lye gives off some pretty nasty fumes at first, I like to be able to keep the windows open to let the fumes disperse. In the winter it is too cold and in the summer it is too hot!

I could make soap in the springtime, but the days are getting longer and my attention is focused outside planting my gardens.

The picture above is my soap in its mold the morning after I made it.


I pop it out of the mold in one big solid block.


And cut it up into neat squares.


The soap then needs to sit for six weeks or more to cure and harden. Then it becomes wonderful soap that I use for everything, from washing my face to washing dishes and laundry. This is wonderful stuff!

This link is where I got my recipe and know-how from.

Why make my own soap?

Well, it is about getting back to a slow self sustaining life. I know I can run to Walmart and purchase soap for a lot less than I can make it at home. That soap will also be full of chemical and synthetic fragrances. The natural occurring glycerins are pulled out of the soap and petroleum based moisturisers are added back in. With homemade soaps I know exactly what is going on my skin and on my children’s skin. This soap seems to last longer too, I only need about 4 batches to get me through the year, and I use it for household cleaning too not just for bathing.

It also makes a really fun impromptu gift for any occasion.

Have a wonderful day!

Composting Part II

Composting is an important part of an organic, sustainable garden. Making my own compost is more than just about not having to pay for it, or not having to use fertilizers. It is about consumption and giving.
Part of being a consumer is making waste. When I eat a carrot the tops and tips are left over. Those could go into my garbage and into a landfill, or they can go into my compost and give back to the soil they took from. When I use eggs, the shells are left over, they could sit in a landfill or go into my compost and create a calcium rich soil that will nourish me and my chickens later.

There are many websites out there that give proper information on composting and will give you the ratios of different materials needed for optimum composting. When I read those I find my eyes glazing over and I go back to my lazy ways. I have had a few people ask me what I do, so I figured I would share, and expose myself for what I am: a lazy composter.


I only have one compost pile going. If I had more room there would be three: one for feeding, one for cooking and one for pulling. Right now I do all three in the same pile, and it works fine for me.

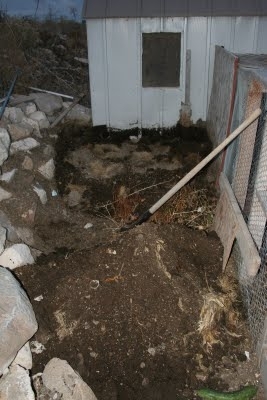
The first thing you need when starting a compost pile is a place to put it, it needs to sit and cook for weeks and months, so pick a place that is out of the way and will not be needed. Mine is right next to the shed and the chicken run.

Then you just add organic material.

I put in fruit and vegetable scraps, paper (shredded, come and try to steal my identity….my bills are composting in chicken manure!), old bread, egg shells, leaves, garden waste, and animal manure. Egg shells will take sometime to break down, I try to break them up a bit when I am turning the pile. Eggs shells enrich the soil with calcium and other trace minerals, which will, in your garden, make your vegetables richer in minerals. If it isn’t in the soil it won’t be in your food.

I don’t put meats, weeds, cooked foods or woody plants in my compost. If you have a wood chipper or are willing to cut up woody plants and trimmings you can add them, they just take a long time to break down, so I don’t bother.

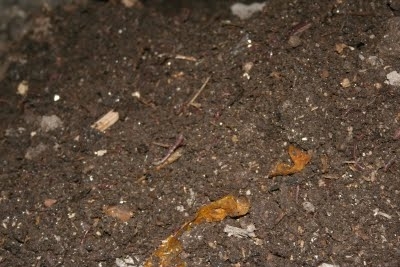
(can you see the worms?)

Any kitchen scraps, including meats I give to the chickens. Then later I add the chicken dropping to the compost, that is a good way to make you food waste work for you.

Depending on the time of year I work my pile differently. During the summer I add everything to the pile and cover it with compost. It then gets turned and watered weekly and everything breaks down very fast.
During the winter, I put it to bed and let it sit and cook. Because we freeze around my parts, the breaking down process slows, but in the center of the pile the process will go on. There have been times on cold February days that I will open the pile and it will be steaming and the worms will be working away.
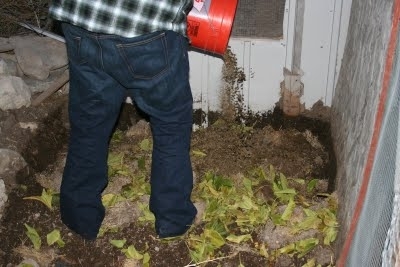
Monday we prepared the bed for winter. First we moved it to the side and added back some of the compost to the pile area, about a foot worth.


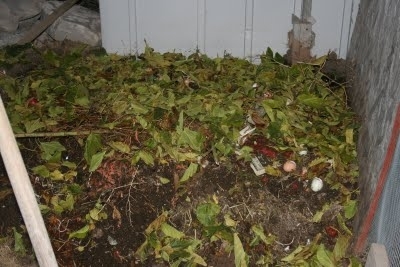
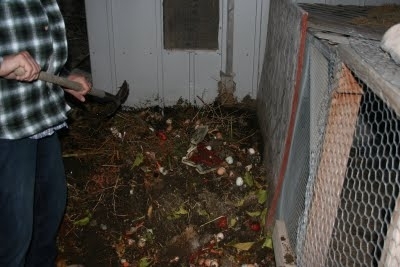
Then we started to layer. It doesn’t matter the order, but layering keeps things from rotting, if you have a whole bunch of vegetable matter in one spot it will rot and not compost. We started with a good layer of leaves.


Then added a layer of rabbit manure.

Then a layer of vegetable scraps, paper and egg shells.

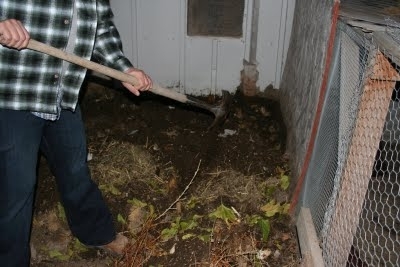
Then a nice thick layer of compost.

We repeated this process over and over until all the material was used.

We will let this sit, mostly undisturbed for the winter. The center will stay nice and warm and all the good organisms will be able to do their work.

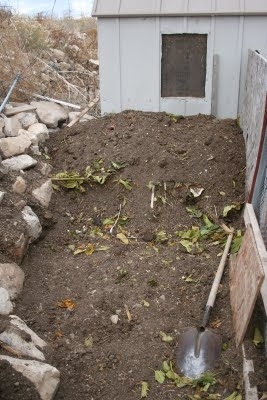
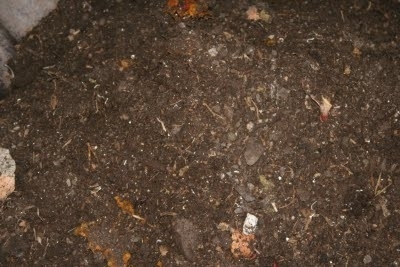
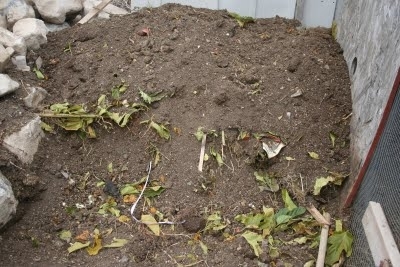
Here is a picture the next day. I will start piling my scraps to the side and cover with dirt, in the spring we will add them to the main pile.

Worms are a great addition to any compost pile. We purchased ours at a local nursery, but you can get them on-line too. We got ours about 3 years ago and they are still going strong. When we first moved here you never saw a worm, ever, but now with the moving the wormy compost around I see them all the time. Worms in the soil indicate healthy soil. I love turning over a shovel full of compost and seeing it wiggly with worms!
Also, you can compost in all sorts of containers. There are nice barrel composters that can be rather expensive, or a plastic garbage can with holes int he bottom work too. Do an on-line search, there are many, many ways of doing it.

While I can’t consider my garden organic, I have been known to use some pesticides, I would like to press upon you a very simple concept. While using basic fertilizers we can grow big plants. That doesn’t necessarily mean they are the most healthy or nutritious. Carrots may tend to have a lot of Vitamin A in them, but if there isn’t all the various macronutrients present in their environment they won’t produce as much or as high of quality. While I think there is a time and place for commercial fertilizers, in general I think it has made the quality of our food go down. If you truly want to provide superior produce for you family using compost is a must!