Real Wild Sourdough Bread

(I originally posted this November 2009, I have since lost my sourdough start, but I am planning on starting another really soon)
“But how do you make the sourdough?” Mrs. Boast asked.
“You start it,” said Ma, “by putting some flour and warm water in a jar and letting it stand until it sours.”
“Then when you use it, always leave a little,” said Laura, “and put in the scraps of biscuit dough, like this, and more warm water,” Laura put in the warm water, “and cover it,” she put the clean cloth and the plate on the jar, ” and just set it in a warm place,” she set it in its place on the shelf by the stove. “And it’s always ready to use, whenever you want it.”
 Laura Ingalls Wilder By the Shore of SilverLake
For Christmas I got the book Nourishing Traditions and it quickly became a favorite of mine. I learned about making real sourdough bread from wild, local yeasts. I had been wanting to try it for a while, and finally got around to doing it.

The simplicity of it all amazed me, I had made sourdough starts before with sugars and yeasts and such. This sourdough consists of flour and water. Yes, only flour and water, no sugars and no commercial yeasts.

I started with 2 cups of freshly ground rye flour and two cups warm water. I stirred it all together and placed it in a gallon jar and cover the top with a light cloth. The cloth is very important, it allows the natural yeasts in the air to collect and feed on the flour while keeping bugs and flies out.

Each day after that I added a cup of rye flour and a cup of water.


I also put the start into a clean jar each day.


After only a few days it started to bubble and smelled like sweet yeast.
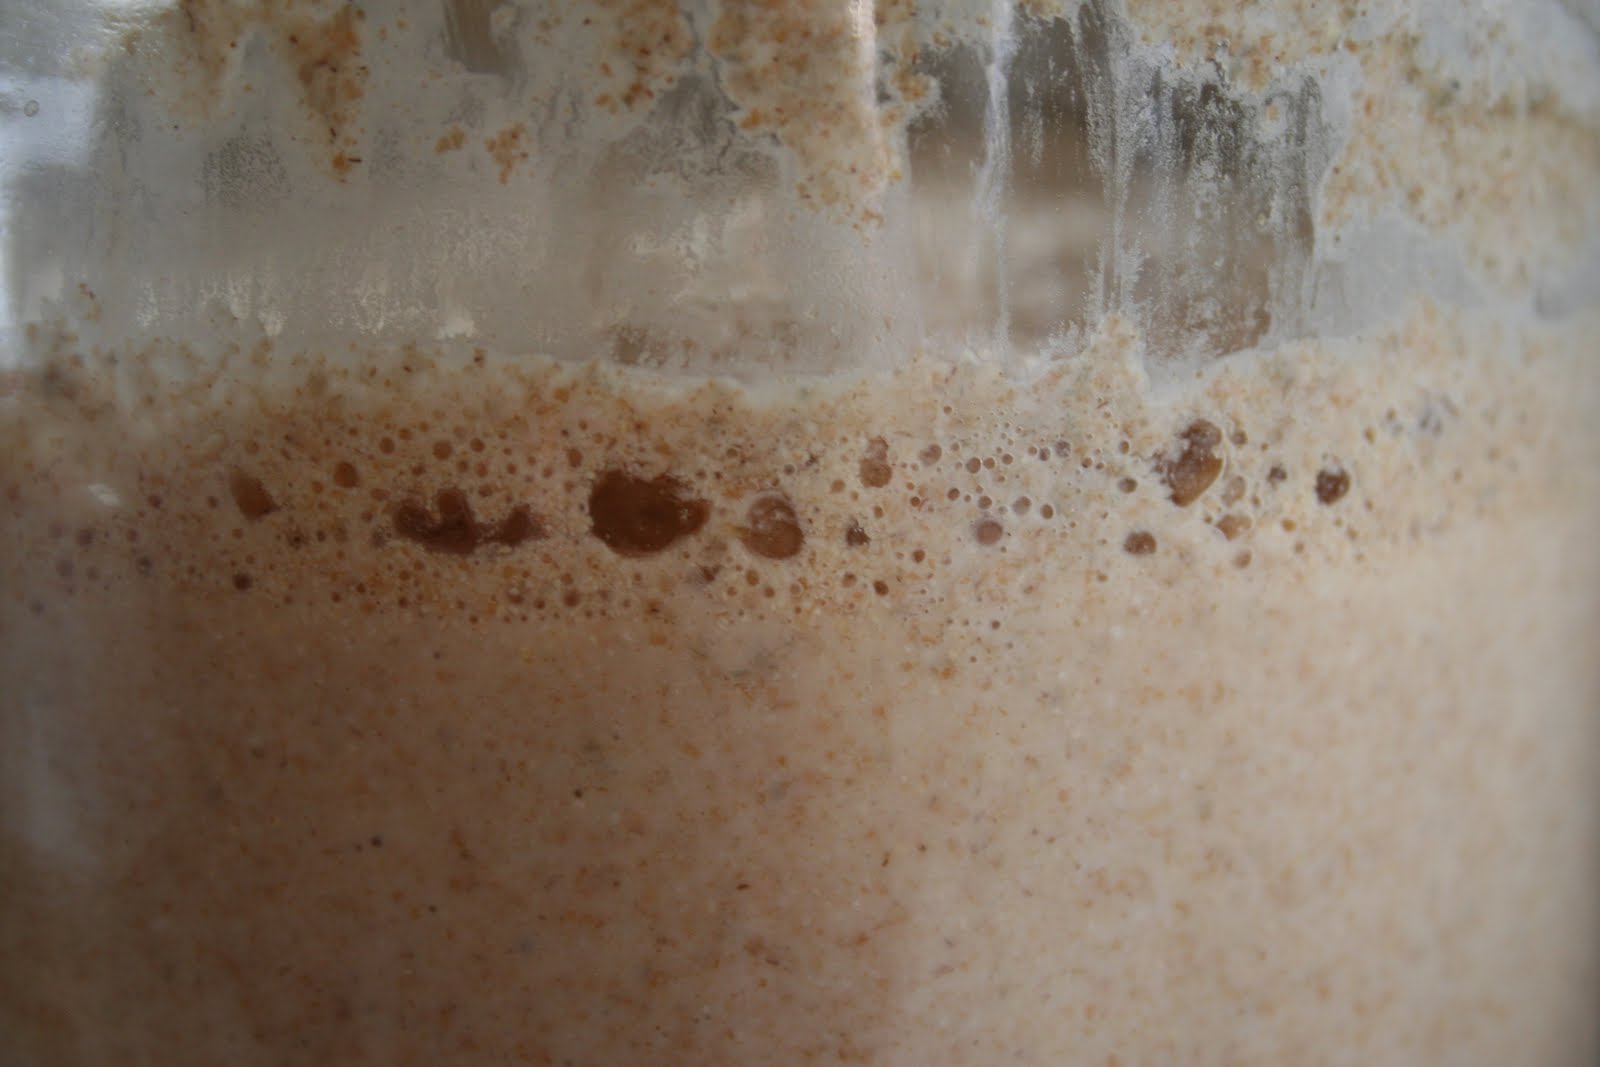
After a week the start is ready
To make the bread I added a quart of starter, a little salt some wheat flour and water.
Approximately
2 cups white flour
5 cups whole wheat flour
1 1/4 tsp salt
3/4 cups water
to a
quart of sourdough start
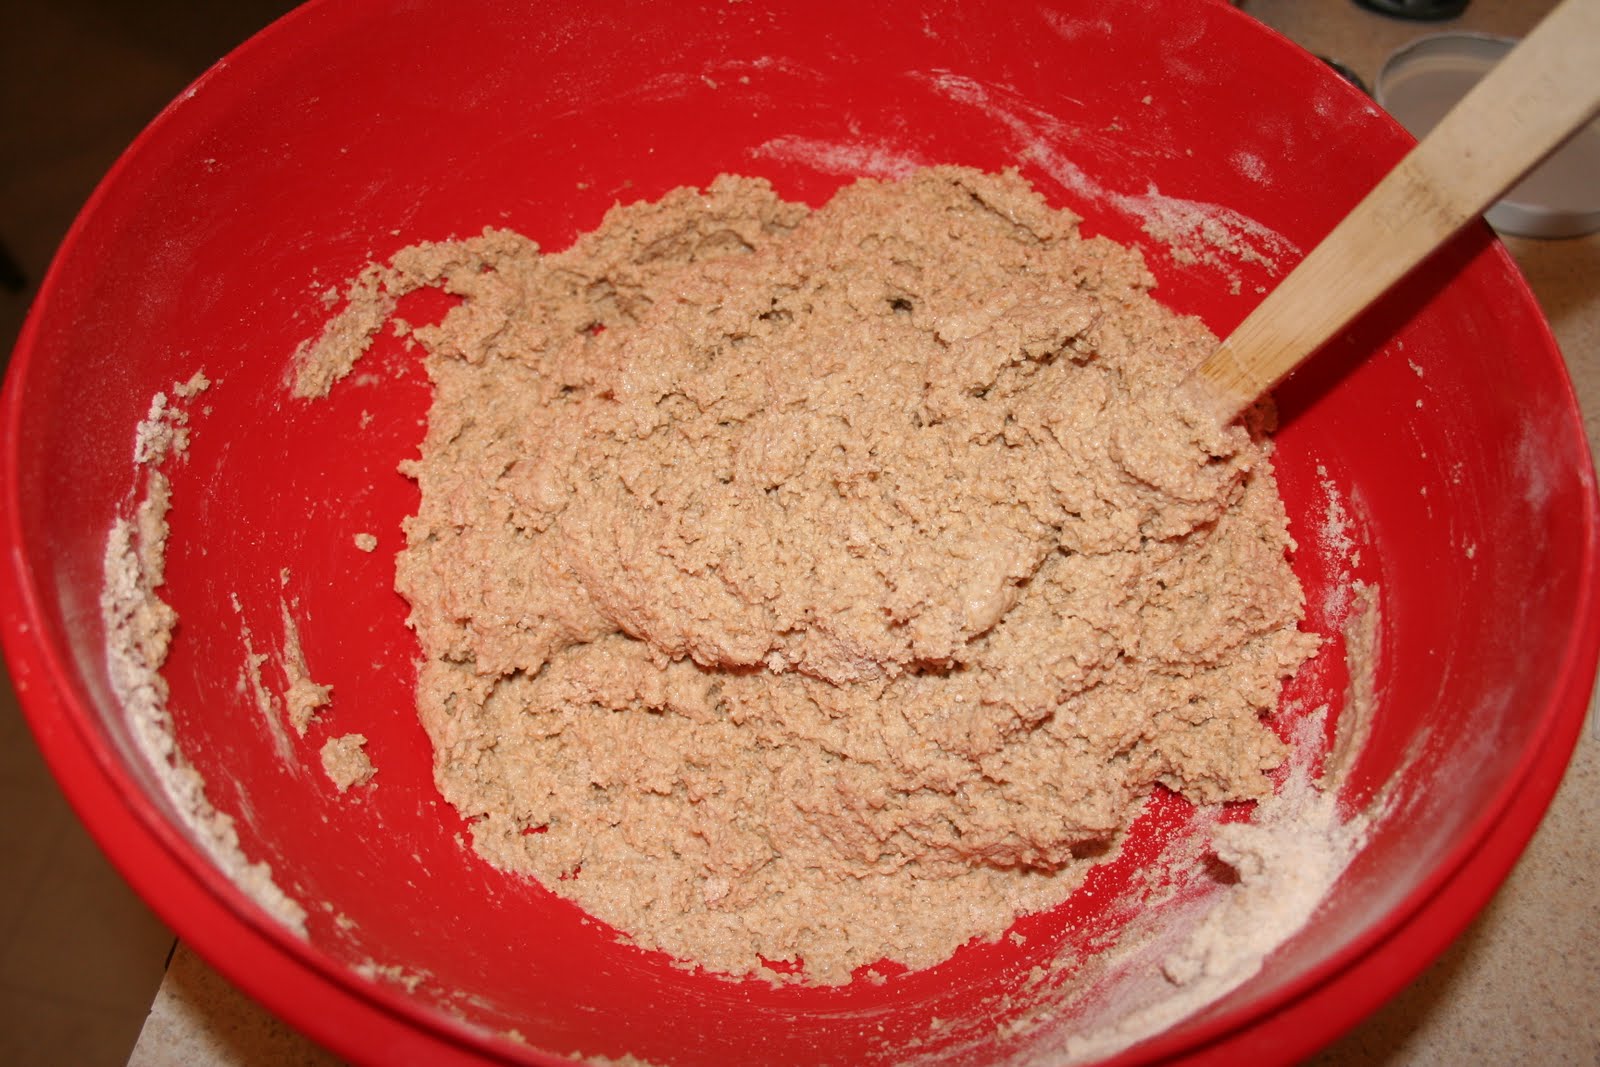
Once it formed a soft dough I kneeded it until it was smooth and elastic.
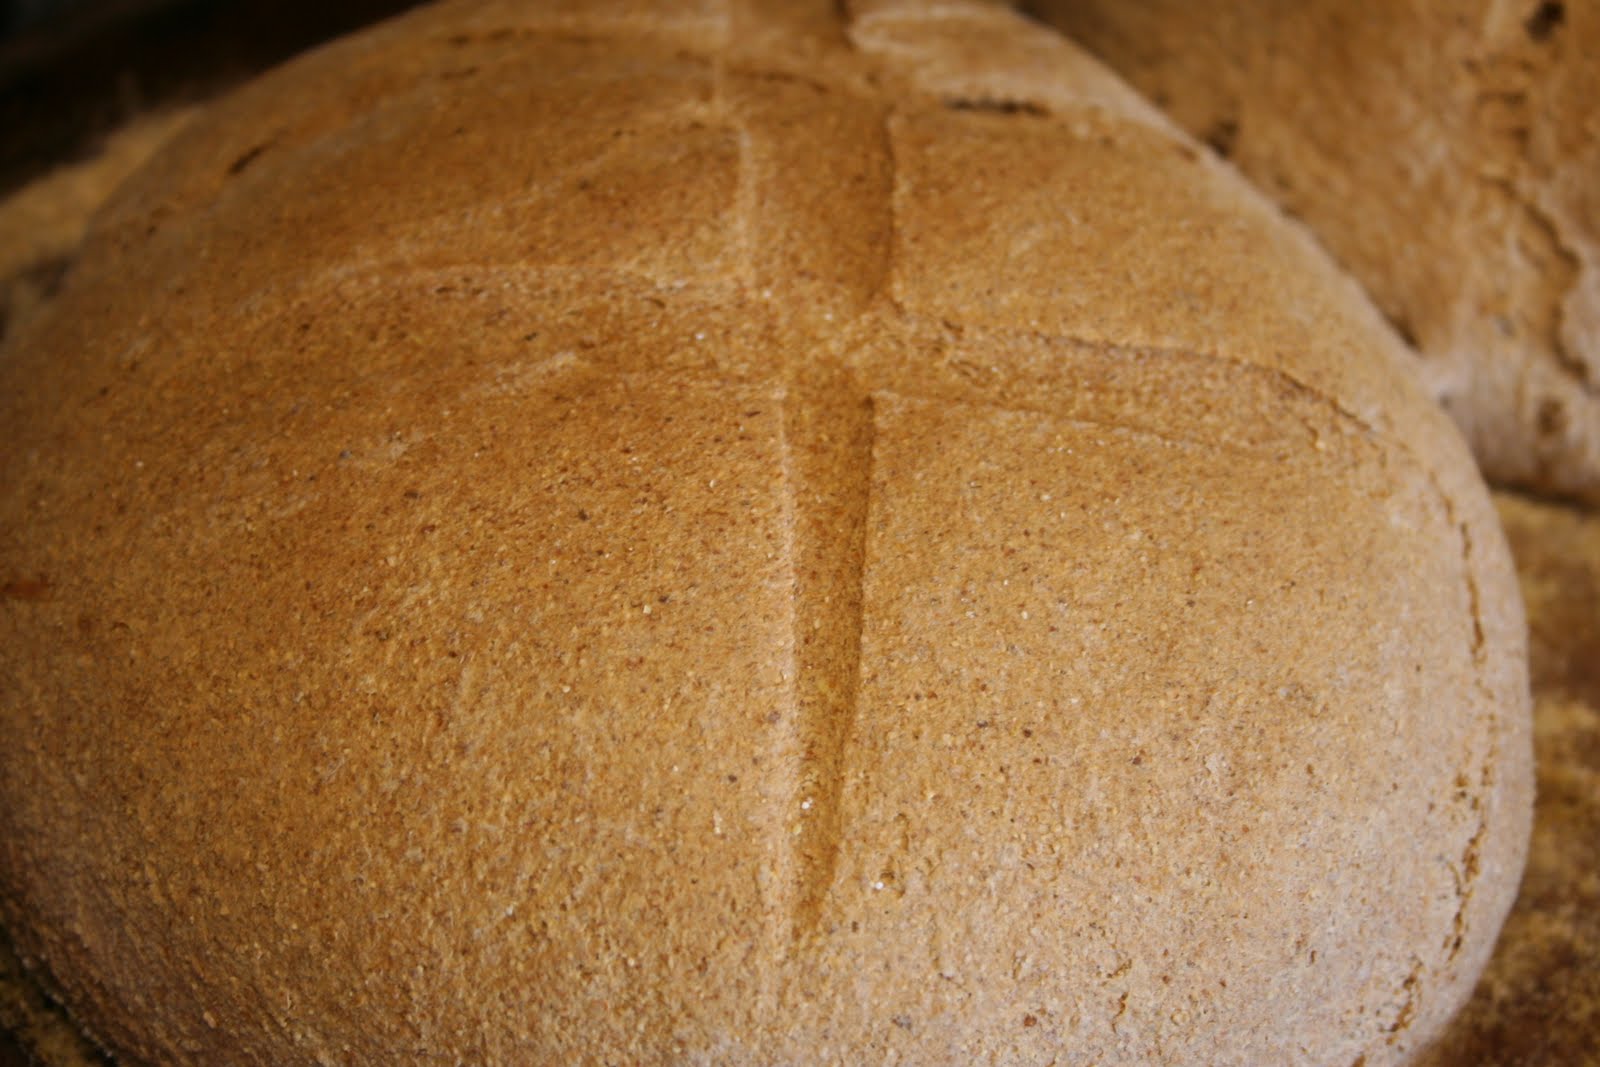
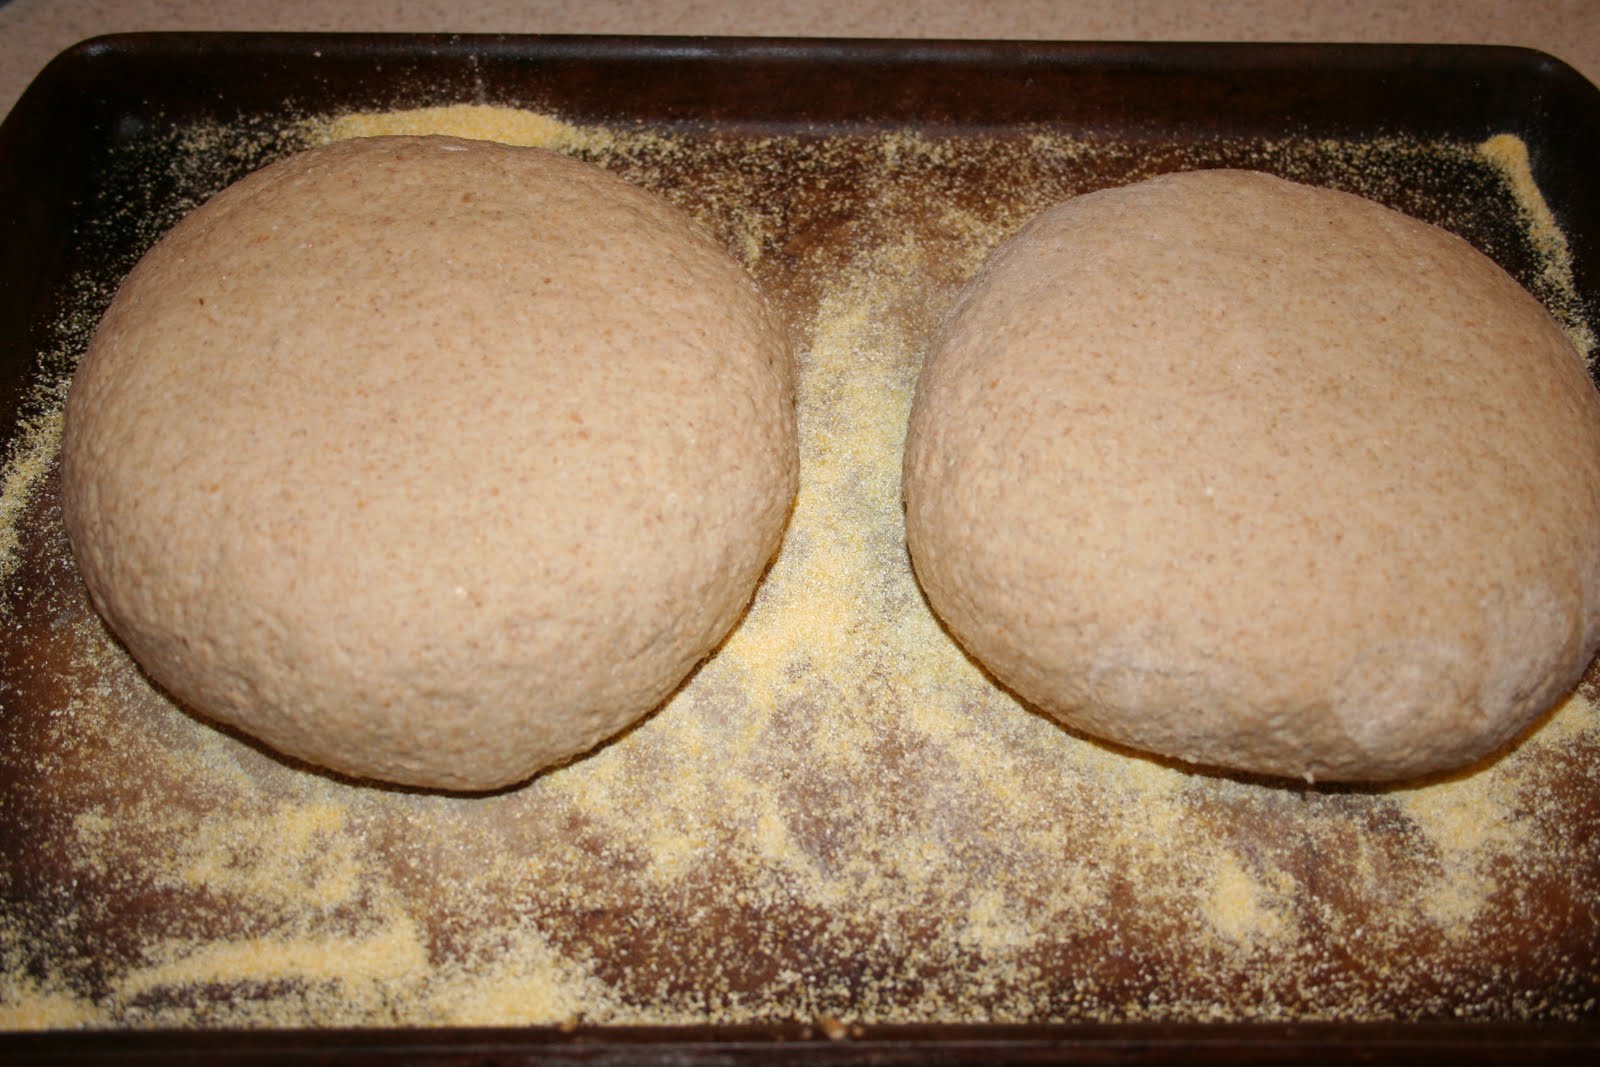
I formed it into two loaves and cut slits in the top, covered and let them raise overnight or about 12 hours. Wild yeast bread takes longer to raise than commercial yeasts.
In the morning I baked the bread for an hour at 350 degrees
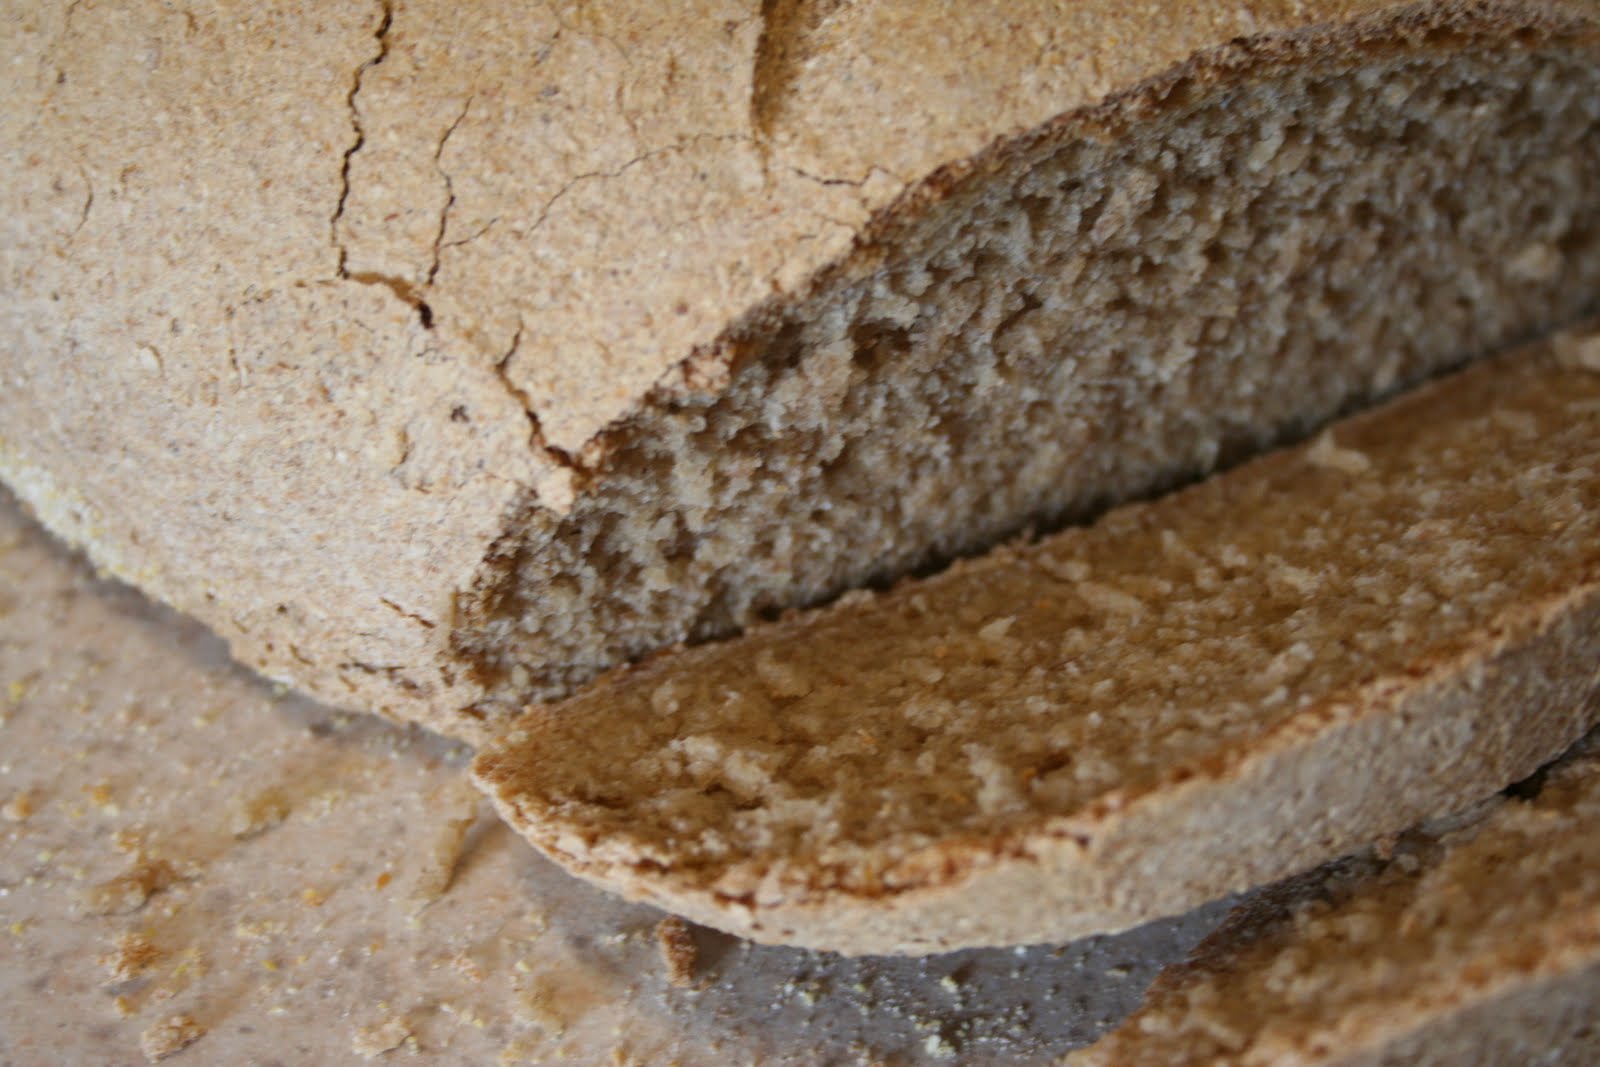
It made a nice crusty loaf of sourdough, the inside was chewy and made a wonderful accompaniment to hot soup that night.

Canning Potatoes

(I originally posted this March of 2009, it is still my most popular post, getting at least 5 hits a day and for a while was at the top  of the google search for “canning potatoes”)

Last Fall I bought 150 pounds of potatoes at a really good price. I have been trying to feed them to my family and while we are potato people we just haven’t been able to eat them all. The nice thing about potatoes is that they store really well. We have a little room that says nice and cold in the winter, sort of like a little root cellar. There are a couple of flaws in our little root cellar, number one is that is doesn’t stay consistently cool as the weather warms up and number two it that there is a window in the room that lets the light in.


As the temperatures have been getting warmer and the days a little longer my stored potatoes have decided that it is time to sprout. That in itself isn’t a bad thing, you can still eat a sprouted potato for a while, it is an indication that their storage days are limited. I knew we couldn’t eat 75 pounds of potatoes before they grew leaves and went bad.


So I decided to can them. I have never canned potatoes before and up until a year ago I had never even heard about canning potatoes. I figured it was worth a try if it meant that I wouldn’t lose all that food.

I scrubbed my potatoes really well and washed them twice. I didn’t want to go to the effort of peeling them, usually we just eat potatoes with the skins on anyway, so I wanted to make sure they were really clean.

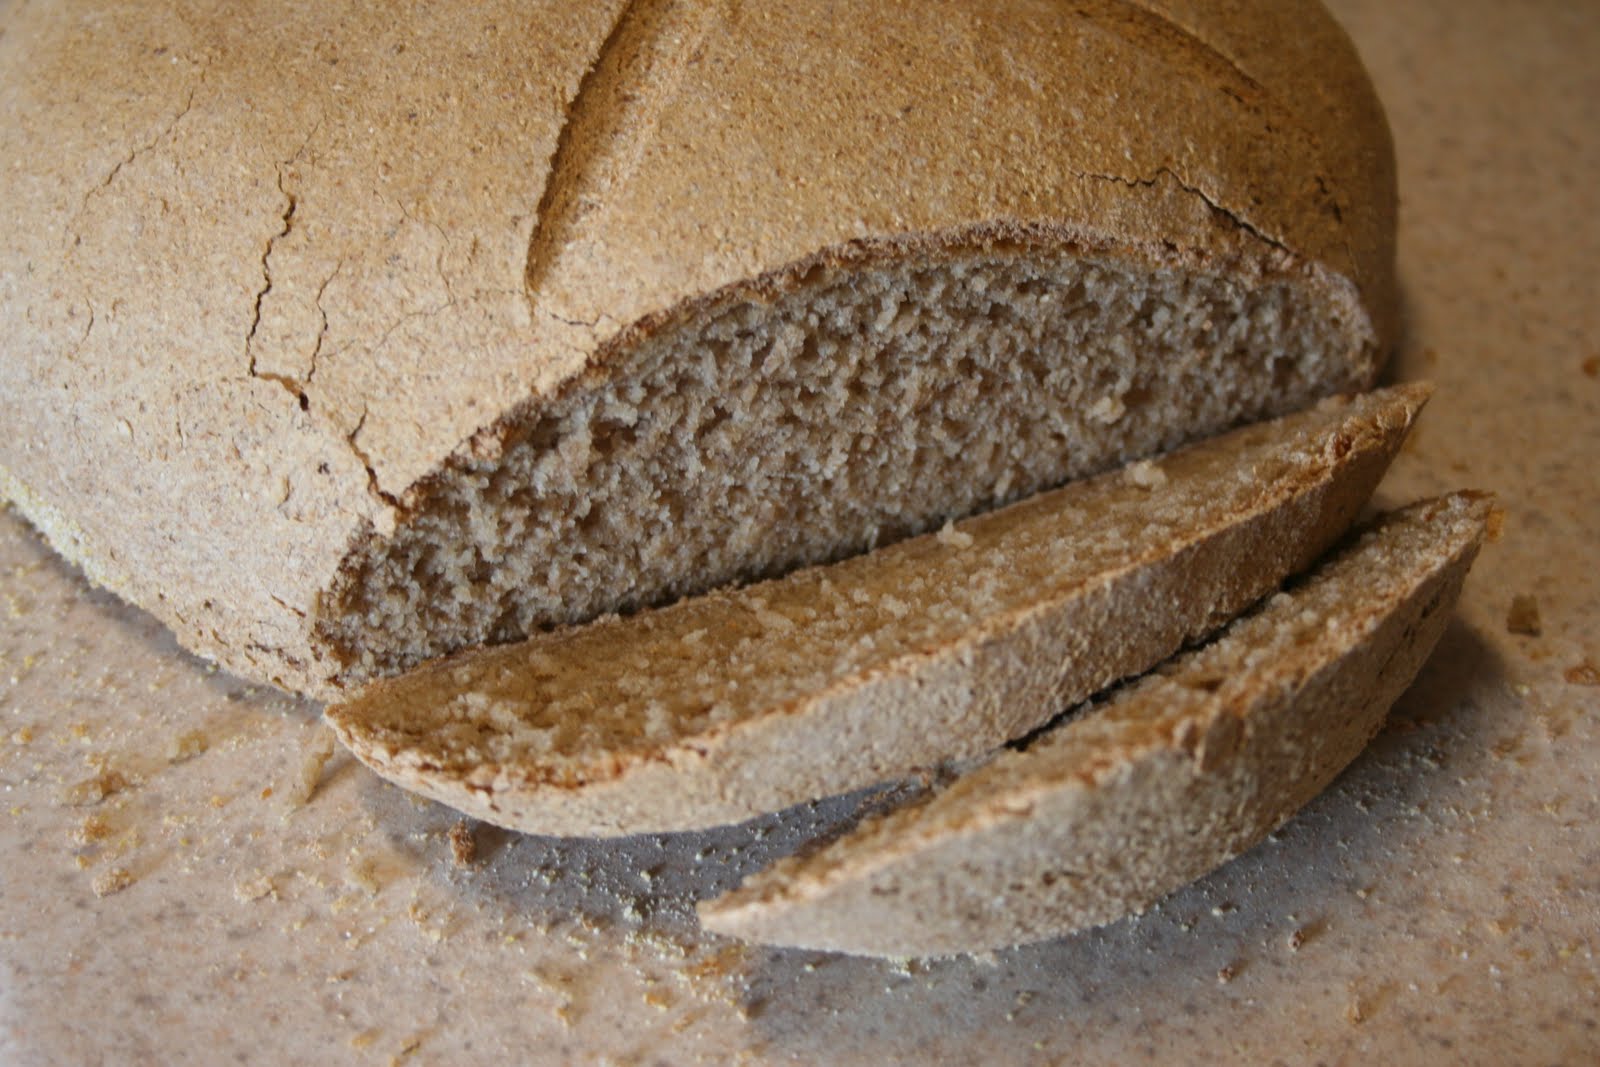
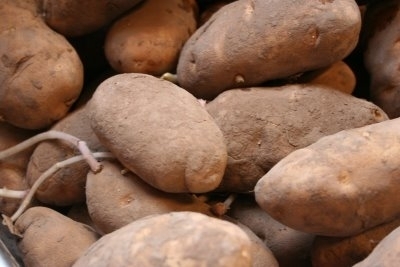
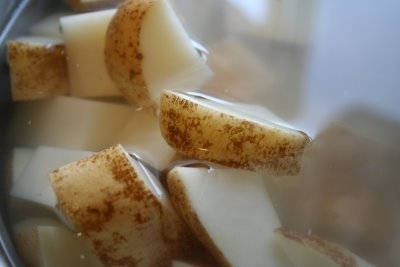
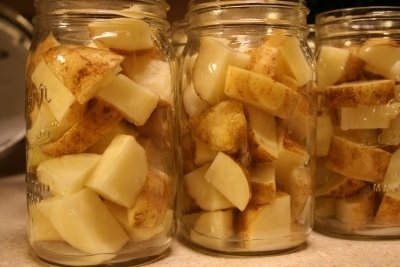
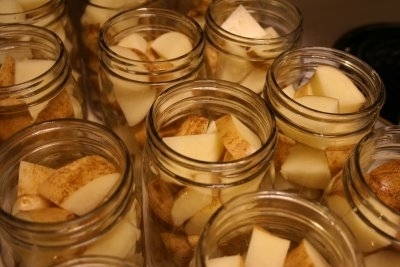
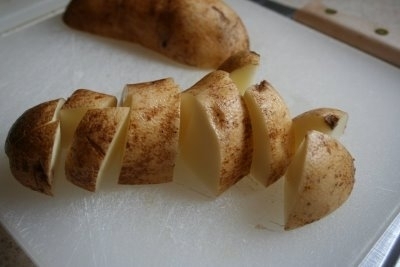
I then cut them into cubes and put them into a salt water brine, it helped keep them from turning brown while I was cutting up the rest of the potatoes.

Once I had enough potatoes to fill my two pressure canners, I loosely packed the potatoes into quart sized jars. I added a teaspoon of salt to each jar then filled them with warm water leaving about a half inch head space.

I put on the lids and processed them for 40 minutes at 12 pounds pressure. I added two pounds pressure because of my altitude, when using a pressure cooker you adjust the pressure for altitude, as opposed to the time as you would for cold water bath.


They were all boiling when I took the out and they sealed really quickly, the first batch was still boiling when I went to bed 2 hours later, and the last batch was still warm when I got up in the morning.

Here they are the next morning, cool and ready to store or eat! For breakfast I fried the potatoes with bacon, YUM! I processed 25 pounds of potatoes, it came out to 28 quarts…..I have 50 pounds to go!

****If you decide to can potatoes you have to use a pressure cooker, any other method is unsafe!****

(Up-date…..after the potatoes have sat for a bit the water will go cloudy, it is the starch from the potatoes coming out into the water, the potatoes are still good to eat, this will not affect the flavor or texture at all)

Preping For the Known and Unknown

This summer I had planned on doing a lot of cooking with my girls, to store up freezer meals for when the baby came.  Then I found out about my partial placenta previa and as the doctor was telling me about the wide range of possibilities, from my placenta moving higher and being no problem, to hospital bed rest and a possible premature birth, I realized that I was very unprepared.  Since then I have felt a huge urge to clean closets, cook, and prepare the baby’s room, most of those things I can’t do.

However, I can cook, as long as I am not lifting heavy pots or do canning, I can pretty much cook anything.  For the last two weeks I have been trying to make meals that can easily be doubled and frozen.  So far I have Chicken Cordon Blu, Sloppy Joes, Taco Meat, Shredded BBQ Chicken, Chicken Fingers and Cooked Chicken Breast (to throw in a salad) all tucked away in my deep freezer.  I am feeling pretty good about my prep work, at this rate, if everything goes well and I am not put on strict bed rest (which I am fairly confident I won’t be) I will not have to cook a single meal for the month of August….how cool is that!
(part of the 10 pounds of chicken fingers I made the other day)
Now if I could only figure out a way to pre-wash laundry……
(on that note, I do have a laundry plan, just in case, which I will share in another post)


Chickens in the Winter

My family and I really enjoy our chickens, OK, really I enjoy keeping chicken and having children around to do all the chicken chores.  Oh, and I need to mention Dadzoo, who does his share of chicken chores.  What are my chicken chores?   I wash eggs, and cook eggs, and take pictures of eggs, and trouble shoot chicken problems from inside the house.
Hmmm, the chicken chores are starting to look a little heavy on the children/husband side and light on my side.
I blame the pregnancy.
Anyway….
One of the major benefits of keeping your own chickens is the nutritional quality of the eggs, depending on what you feel the chickens.  Chickens are natural foragers, they will eat everything from bugs, to vegetation, to seeds, and while keeping chickens on a store bought feed is adequate, it isn’t optimal.  During the warm months our chickens eat a lot of forage, we feed them weeds, bugs, snails,grass clippings, vegetable trimming and table scraps.  (I have even seen my chicken kill and eat a mouse…who needs cats!)  The eggs produced during these warms months are wonderful in taste and color, the yolks being dark orange, and indication of  a lot of vitamin A and D. 
In the winter, as you can see from the pictures below, there is little to no opportunity for forage items out of our yard, we do still feed them some table scraps, but not as much.  Durring this time of year the quality of our eggs goes down, indicated by the yellow yolks as opposed to the dark orange found in the summer time.

I think I found a solution this year.

The yard is frozen solid, and covered in snow, what happens to not be covered is very much dead.
Last years cabbage patch…
This past summer I planted all sorts of squash and pumpkins in any little nook or cranny I could find.  In some places the vines took over everything, but that is OK, they were beautiful and green, and I harvested a lot of squash. 

Here in lies a little problem, my family doesn’t like squash.  I know, weird!  I love squash baked, buttered and sprinkled with brown sugar, but the other guys that live in my house will have nothing to do with it.  So I was left with a lot of uneaten squash tucked in my root cellar (basement).  That is when I got the idea to cut those babies in half and feed them a little at a time to my chickens.

It was a hit with my ladies!

They love picking at the squash, eating the whole thing, from seeds to rind,
and my eggs
dark orange yolks.

(for a great article with lots of information on the value of egg yolks go here, and you will see why I am so weird about my eggs!)


This coming summer, I will be planting squash again, if only for the chickens and their wonderful eggs.

Eggs, long term storage

Right now my chickens are producing splendidly.  I am getting about a dozen eggs a day.  I can usually keep up with production, considering it takes 18 eggs to feed my family a breakfast of scrambled eggs, and also randomly giving eggs aways to friend and neighbors.  Tonight I washed a whopping 9 dozen!  I thought about offering some for free on facebook, but then I got to thinking….I might as well preserve some, because when January comes their egg production will go way, way down.  (That is when I turn off the artificial lights and give my girls some much needed rest).
One of the easiest ways to preserve eggs is to freeze them.  You can also pickle eggs and oil eggs.  I am not too fond of pickled eggs and I have never tired the oil method (you can guarantee that I will try oiling eggs at some point though).  So freezing it is.

It is simple, all you need to do is crack those little babies open, pop the yolk and freeze any old way you would like. I opened each egg into a section of an ice cube tray.  One they are frozen, I will store them in a plastic bag in the freezer.  I like this way, because I have a good idea how many eggs I have if using them in a a recipe.  Now my ice cube trays didn’t quite hold one full egg, so if I so use them in a recipe I will probably use two of the frozen egg sections.

 Otherwise, one tray is about one breakfast for us.  I could also crack 18 eggs into a bowl, add milk salt and pepper and freeze that  mixture, knowing that it is exactly the amount I would need for scrambled eggs in the morning, all seasoned and ready to go!

This tip isn’t just for chicken people, there are times of the year that eggs are really cheap (I am thinking Easter) when a whole bunch could be bought and stored for times when food and/or money is scarce or for a convenient meal.